We will copy some parts of this tutorial provided by OneSignal to match Sngine app:
https://onesignal.com/blog/how-to-add-push-notifications-into-an-ios-app
Creating an Apple iOS Push Certificate
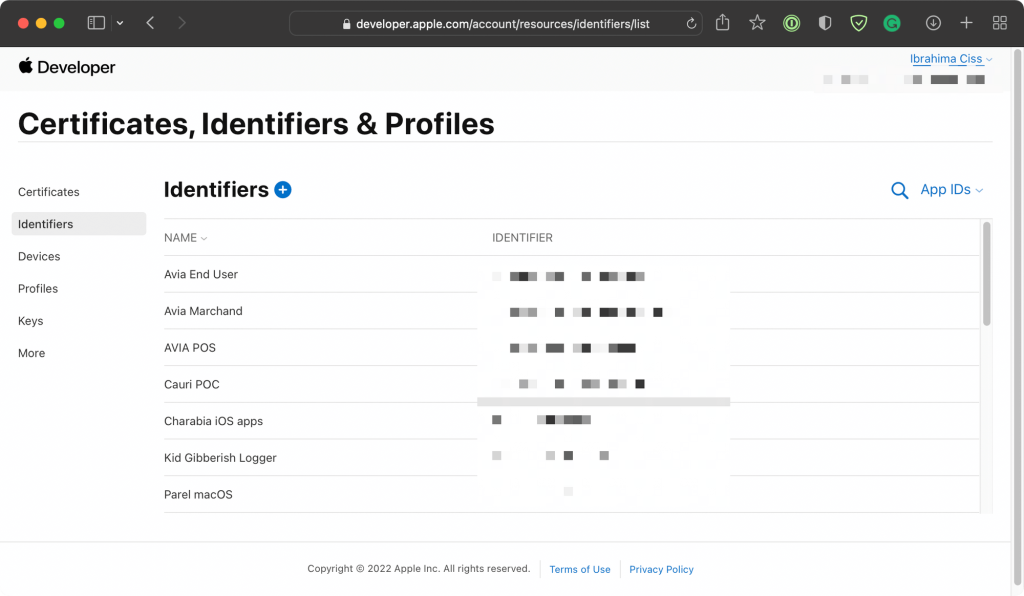
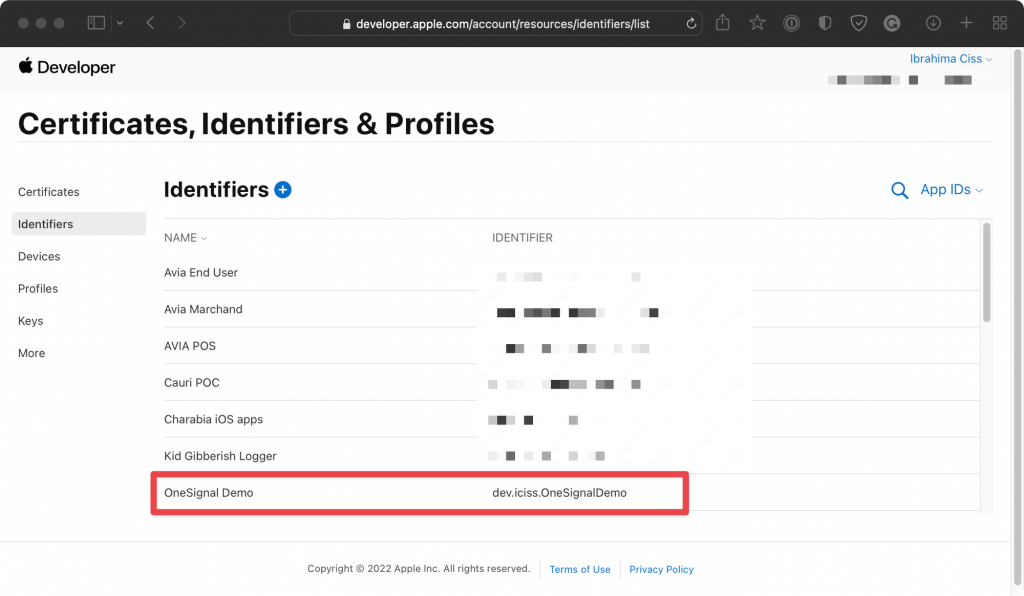
Before sending push notifications, you’ll need to generate an iOS Push Certificate. To do that, you’ll need to ask Apple to give you a production certificate. Go to the developer portal, click on Certificates, IDs & Profiles, and then click on Identifiers. Look for the app ID you just created in Xcode. If you can’t find it, click on the + button in order to add it.
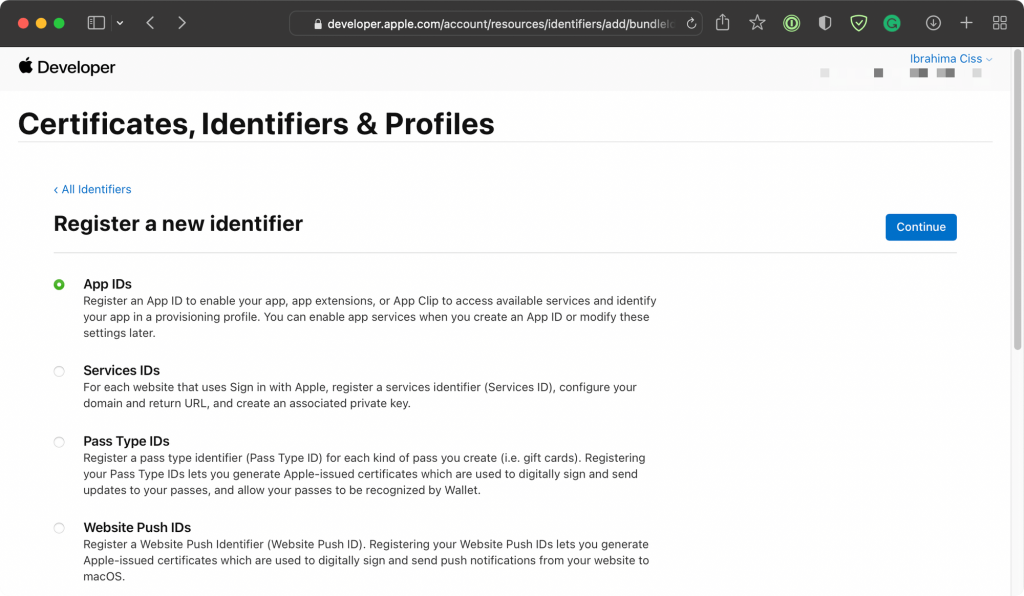
On the Identifiers and Profiles page, the App IDs option should already be selected. Simply click on the Continue button and you’ll be redirected to the type of app you want to create the ID for. Click on Continue once again.
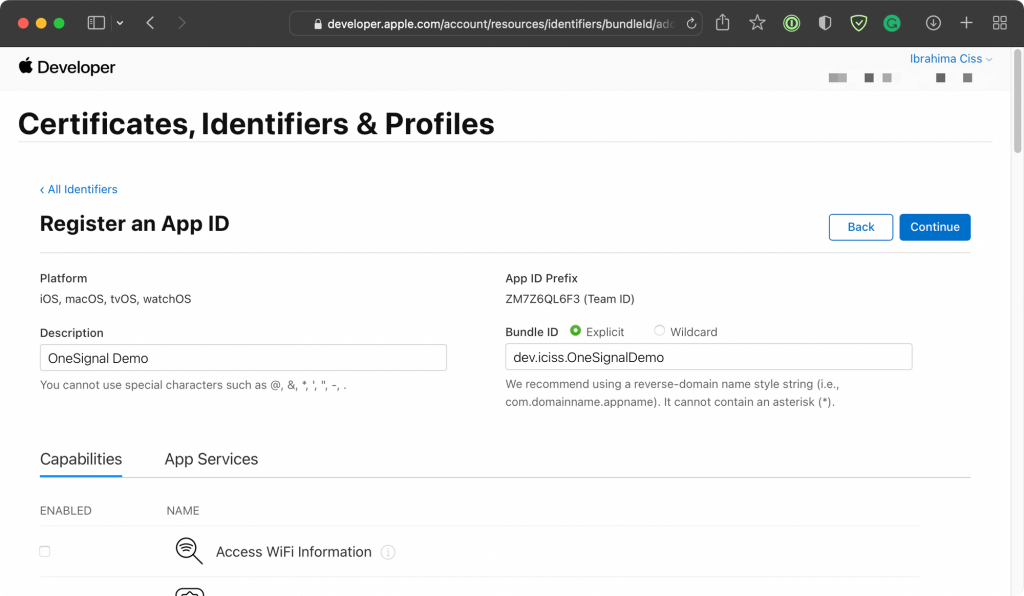
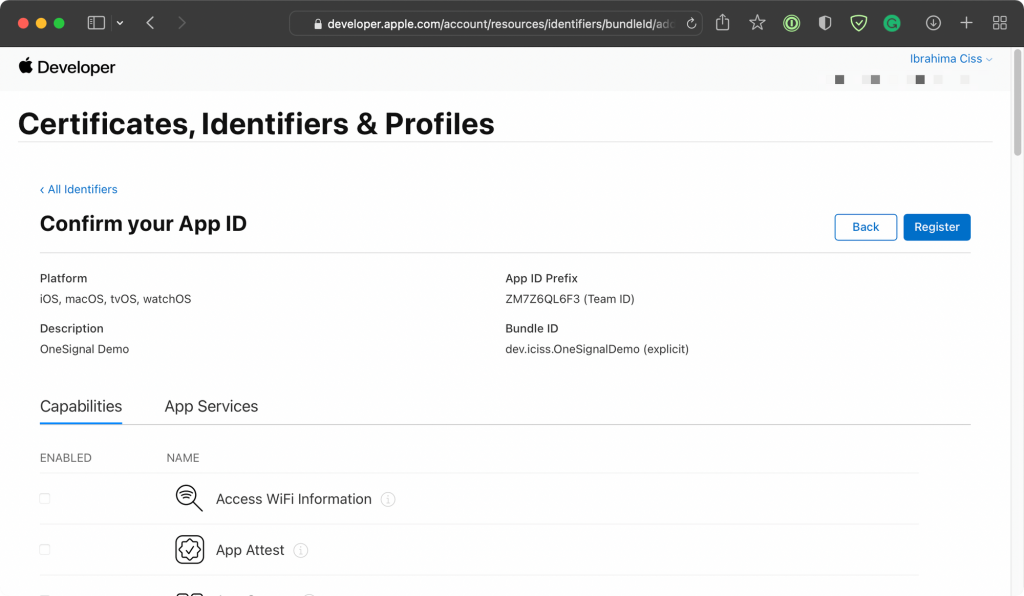
Now you’ll land on the App ID registration page where you’ll see two form fields for Description and Bundle ID. Fill them with the correct information, being sure that the Bundle ID exactly matches the one you create previously in Xcode.
Once you click the Continue button, you should see a review page. Click on Register and voilà — you should now see your app in the Identifiers list.
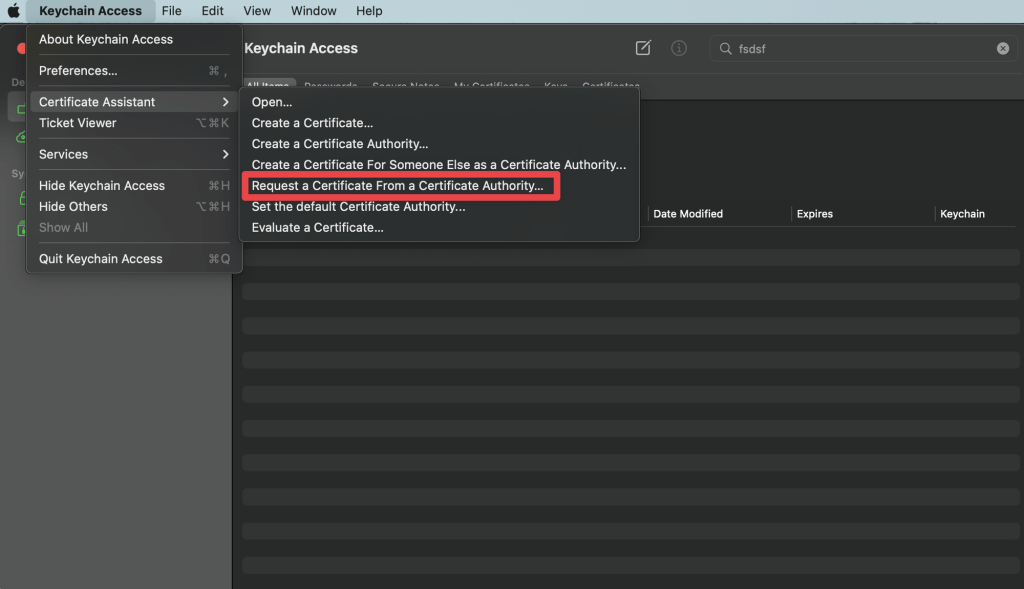
Next, you’ll need to generate a certificate for OneSignal. To do so, open the Keychain Access app, select Certificate Assistant from the drop-down menu, and click on Request a Certificate From a Certificate Authority. This option just means that your machine is going to be the one with the private key for this particular certificate.
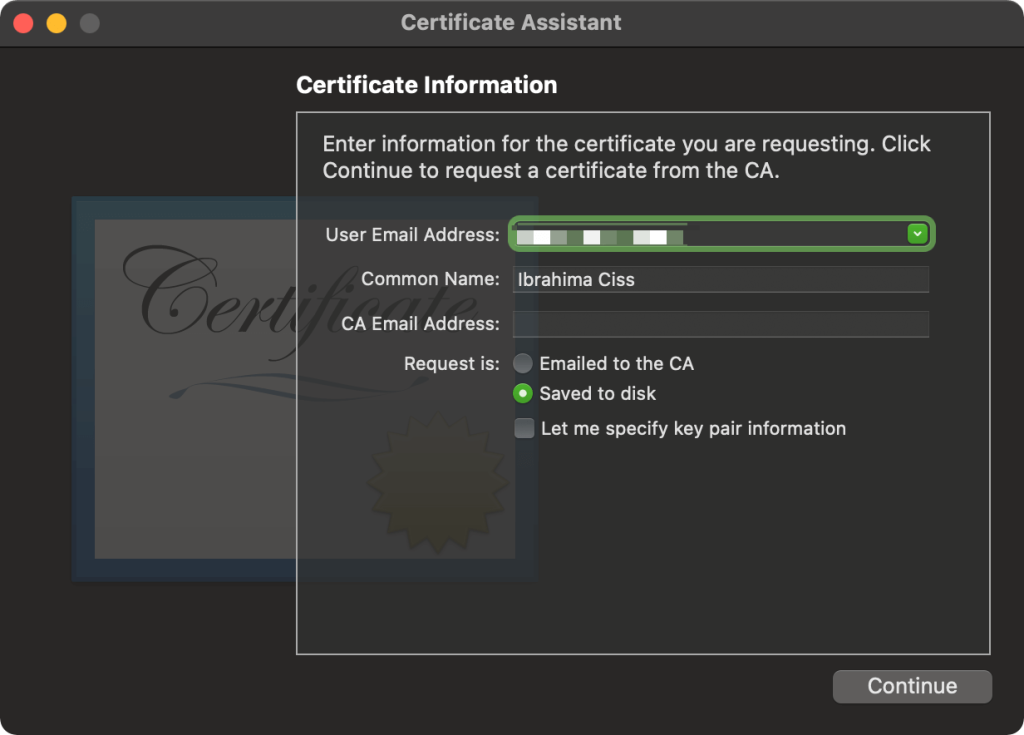
A window should appear asking you to provide certificate information. Enter your email address and check the Save to disk option. You will also be prompted to choose where you want to save the certificate request. Make sure to save it somewhere safe.
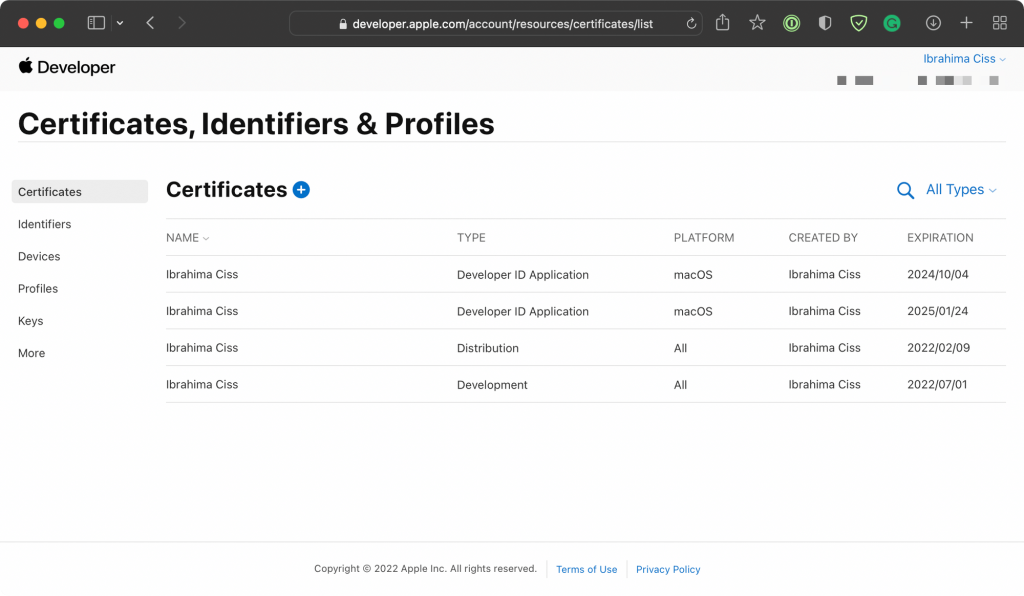
Now, you’ll need to go back to Apple’s developer portal and create a certificate. To do so, click on the + button.
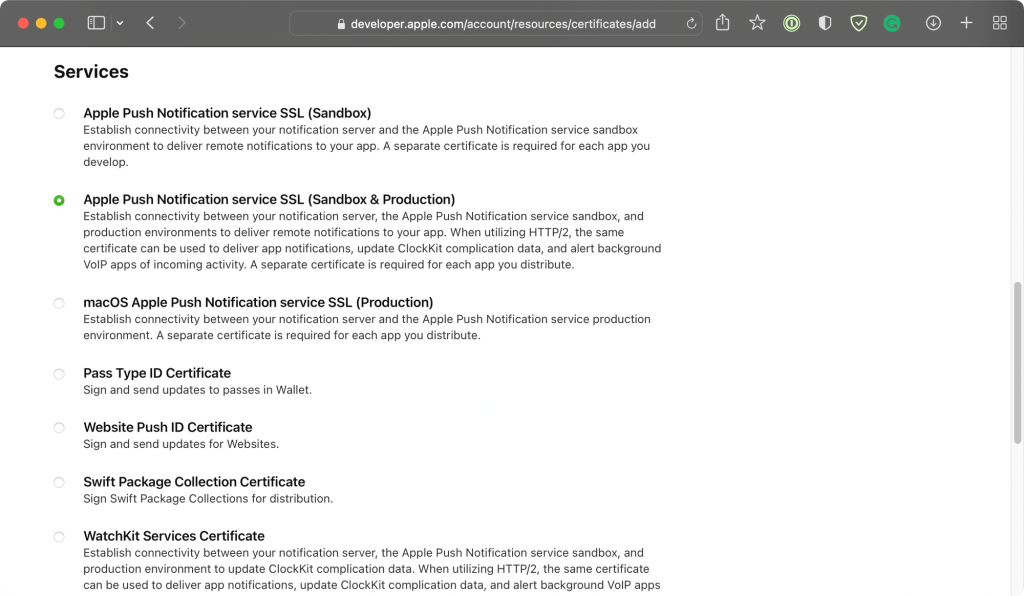
You’ll be redirected to the Certificates creation page. Scroll down on this page until you see the Services header. Under this header, select the option entitled Apple Push Notification service SSL (Sandbox & Production) and then click the Continue button.
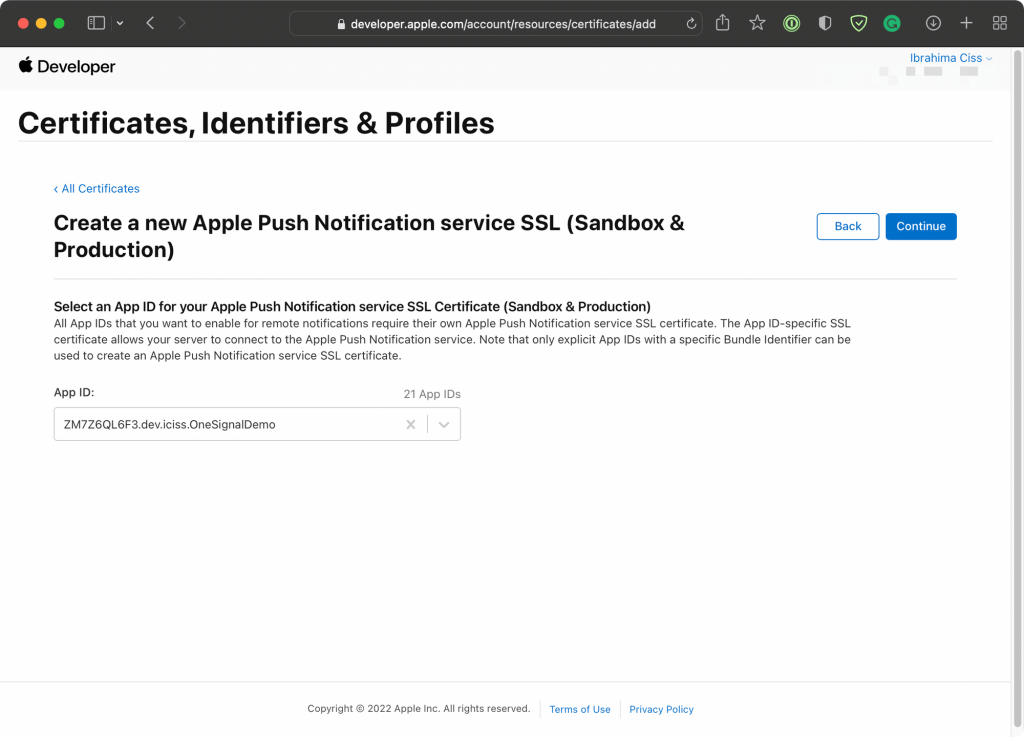
On the next page, it’ll ask you for the App ID that you want to create the certificate for. Select the one you created earlier from the drop-down menu and click the Continue button.
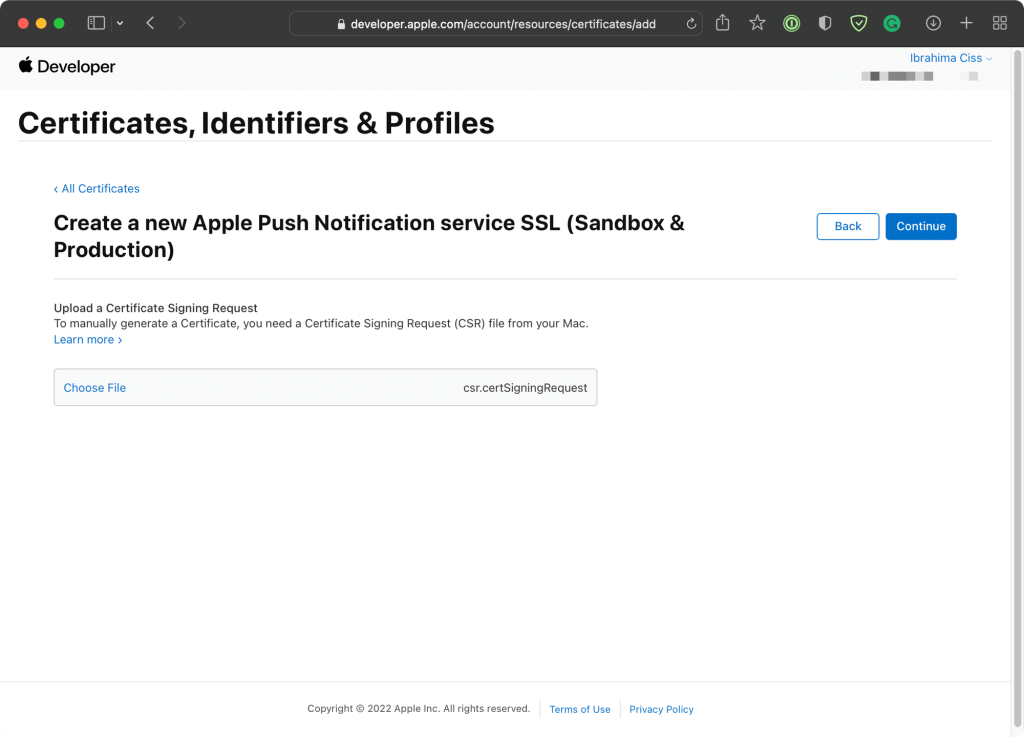
Next, you’ll be prompted to upload the Certificate Signing Request. Choose the file you saved previously and click Continue.
f everything works just fine, you should be redirected to the download page. Click on the Download button to download it and double-click to open it in the Keychain Access app.
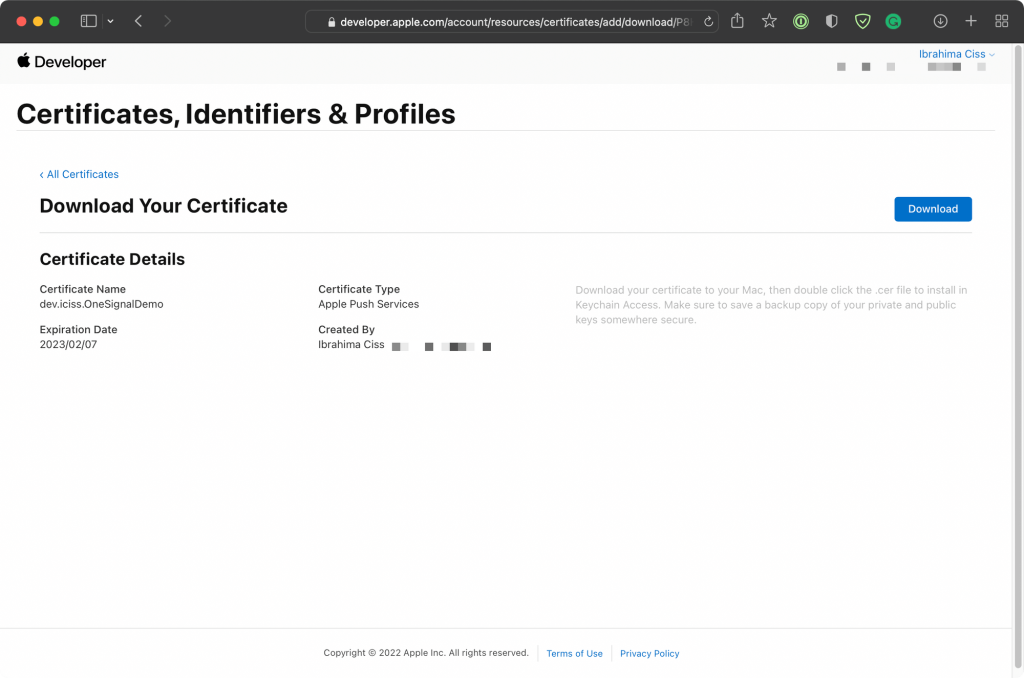
In the Keychain Access app, navigate to the My Certificates tab and find the certificate you just create which has your app bundle ID in the name. Right-click on it to see the options, then click Export from the menu that appears. It’ll prompt you to provide the location of the certificate. Select somewhere on your machine and type a password for the certificate.
Setting Up Your OneSignal Account
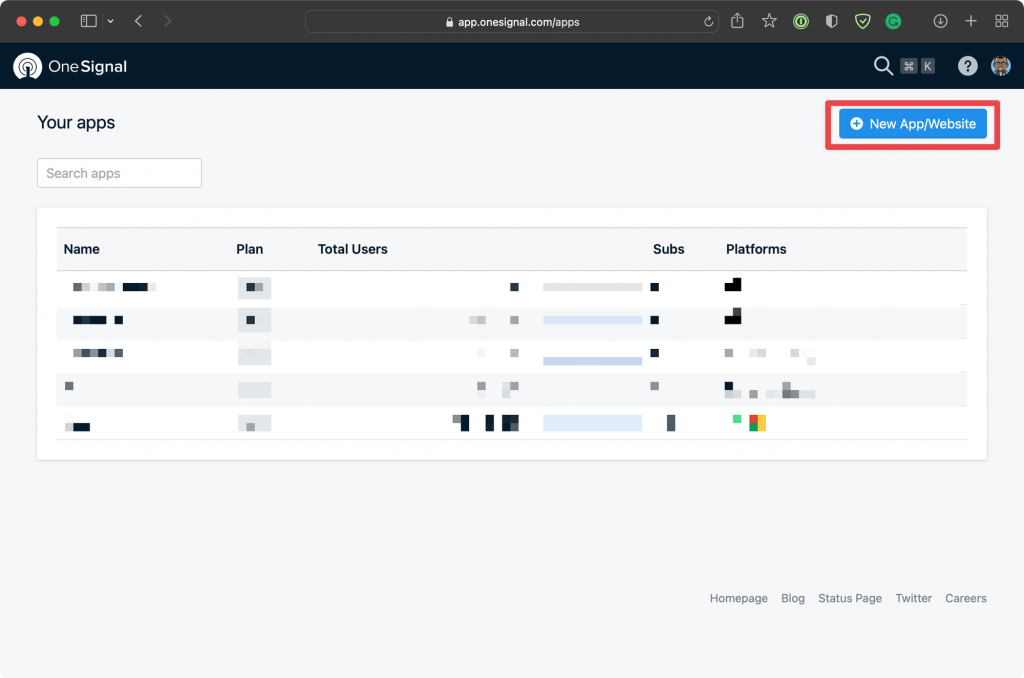
In the OneSignal dashboard, click on the New App/Website button.
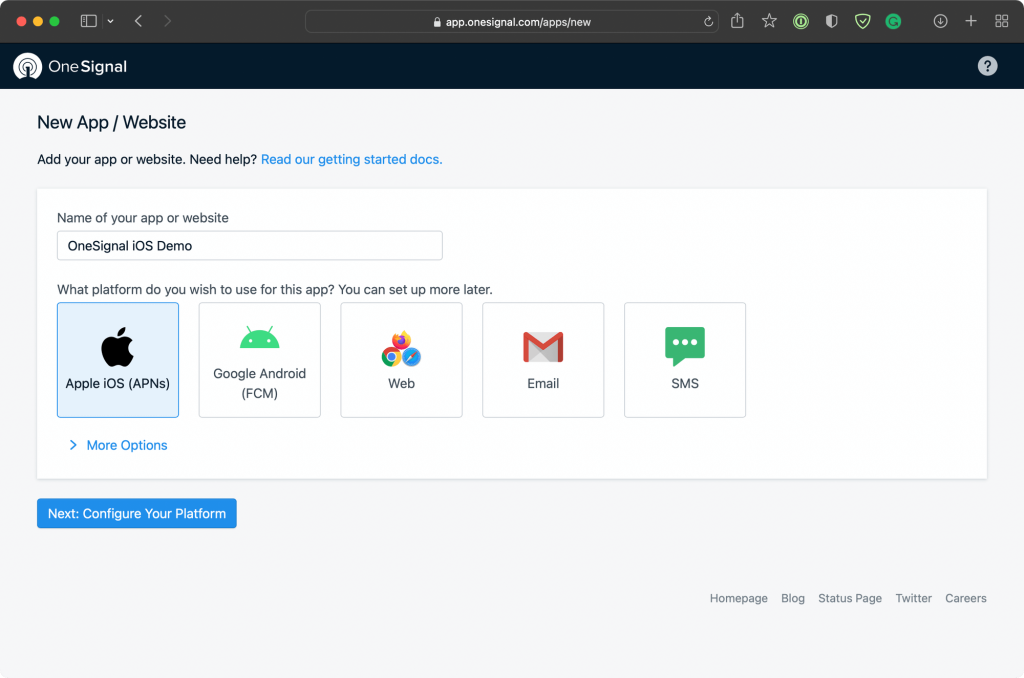
On the next page, type the name of your app and select the Apple iOS (APNs) option for the platform and click on the Next: Configure Your Platform button.
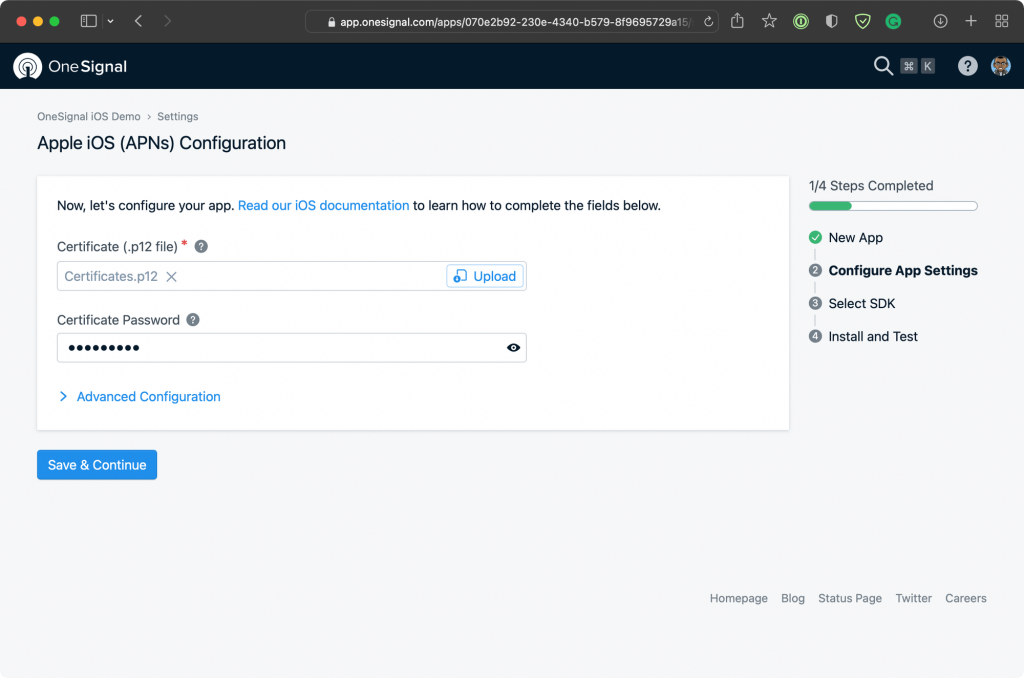
You’ll be prompted to upload the Apple certificate file you created in the first part of this tutorial. Locate the certificate on your machine, type in the password for the certificate, then click the Save & Continue button.
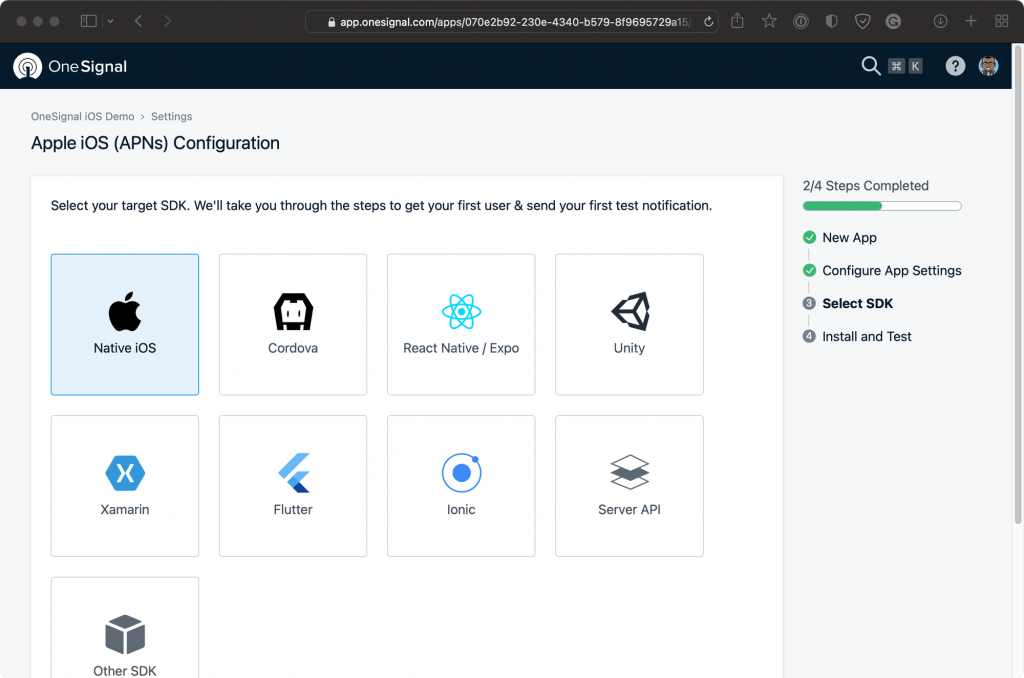
Next, you’ll be prompted to choose your target SDK. Select Native iOS as the target SDK and click on Save & Continue button at the bottom of the screen.
In this final step, under 1. Install the SDK, you should see the App ID provided by OneSignal. Copy it somewhere where it’s easy to retrieve — you’ll use it in the code later. Once you’ve saved the ID, you can click on Done.
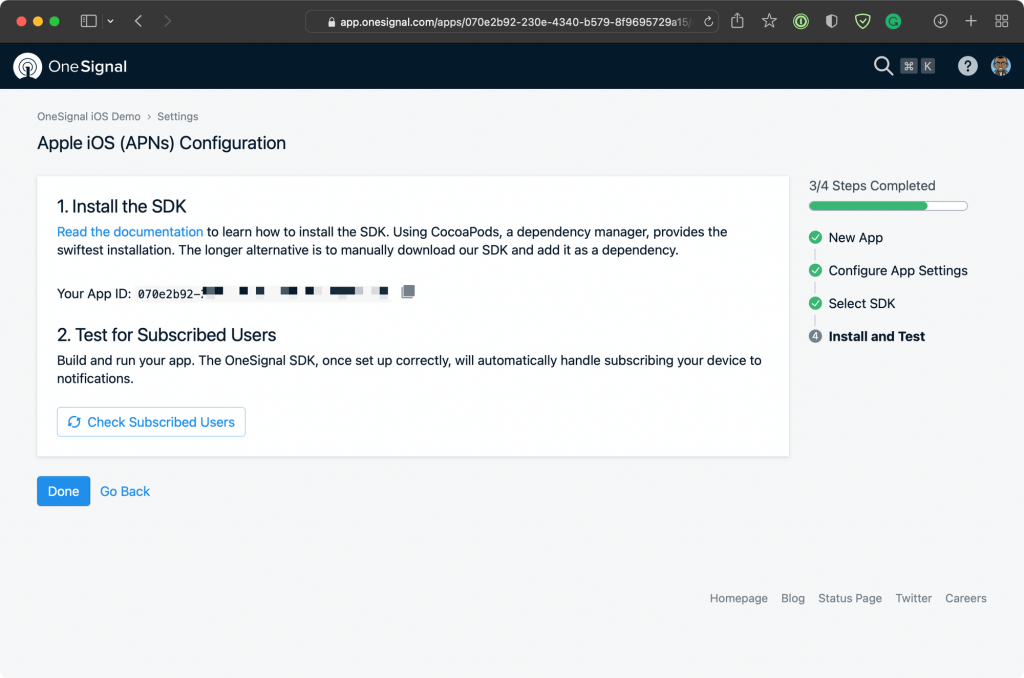
Congratulations, you’ve successfully configured your OneSignal project and you’re almost ready to send your first push notification 🥳 ! The last step is to go back to our iOS project and configure it so that it can receive notifications from OneSignal.
Setting up Push Notifications in iOS
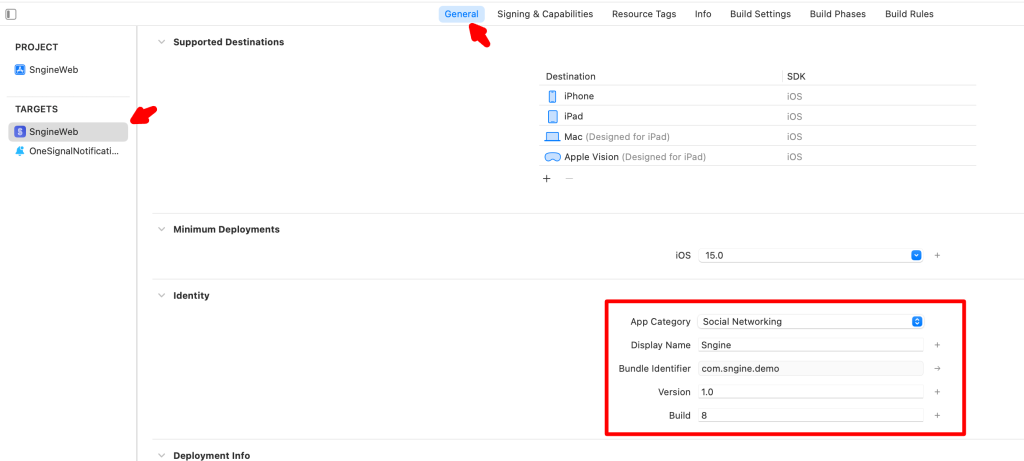
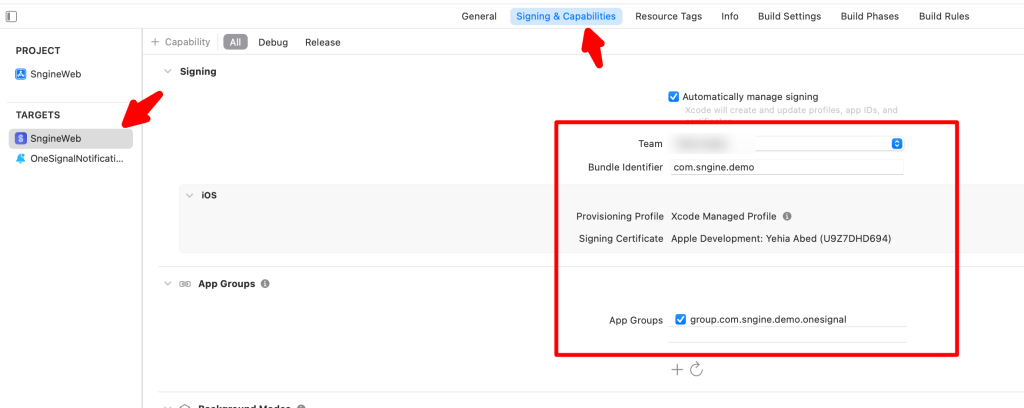
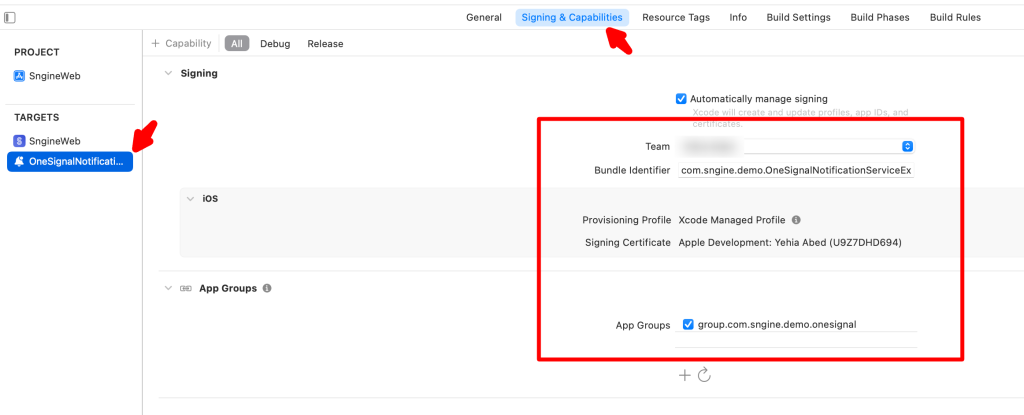
Now you will need to change the followings:
- Change “oneSignalAppId” in “SngineWebApp.swift“
- Change “urlString” in “ContentView.swift“
- Change “Display Name” in General
- Change “Bundle Identifier” in “Signing” for both “SngineWeb” & “OneSignalNotifications“
- Change “App Groups” for both “SngineWeb” & “OneSignalNotifications“
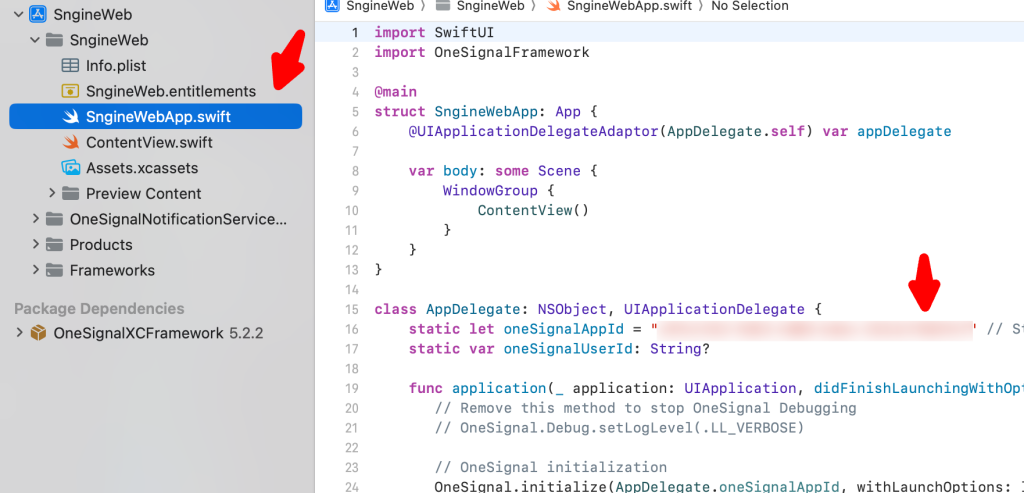
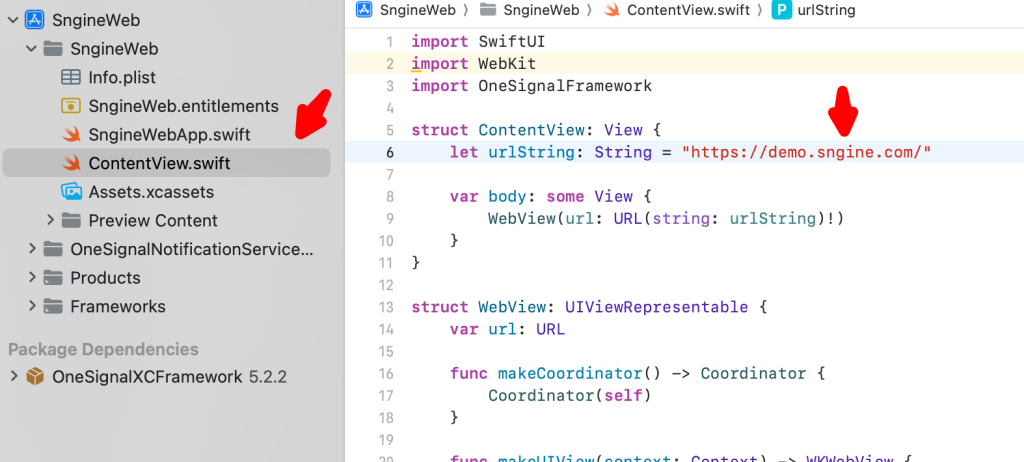
After that you can build the app and publish it to your https://appstoreconnect.apple.com
Note: If you don’t know how to do it you can hire Sngine team to do it for you and save your time and effort. For any Freelance work you can contact our development team from the contact form: https://codecanyon.net/user/zamblek#contact
That’s it.
Happy Sngine 🙂
Buy Sngine or Extend your support: https://bit.ly/BuySngine

